Looking back to Exchange 2007 and 2010 the creation of a send connector has changed as the layout has changed. In Exchange 2013 the Send Connector is located under the mail-flow in the EMC. The Send connector is basically a connector that enables your Exchange server to send mail to all domains (internal and external) and by default it is not configured in the Exchange Management Console (EMC), when you first install an Exchange server and without it you wouldn’t be able to send any mail.
For better configuration and security it is always recommended to configure your send connector to send mail through a smart host to hide it from the prying eyes on the internet.
First thing to do is open your EMC and click on mail flow (Figure 1) select Send connectors and click on the PLUS sign to add a new one.
Figure 1:

A new window (Figure 2) will open prompting for a meaningful name i.e.: Internet or outbound mail etc. to the connector. Note that there are multiple Exchange connectors you can create but in this case we will only focus on a generic send connector to send mail to the internet.
Figure 2:

Click next, in this window (Figure 3) you need to decide how you would like exchange to route mail; basically you have two options:
1- Let Exchange directly send mail, using standard DNS lookups to locate the destination MX record and send mail
2- Let Exchange route mail through another server, aka smart host which will send mail on Exchanges behalf. This is the preferred way if you don’t want to divulge your Exchange IP to external.
Choose the proper option and if you decide to use smart host then click on the PLUS sign to add the IP address, otherwise just click NEXT.
Figure 3:

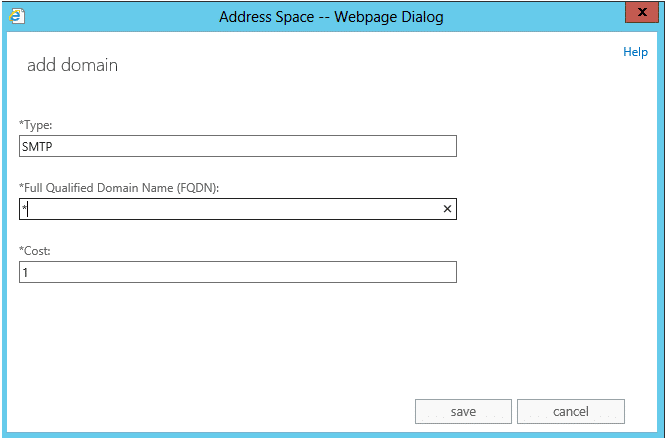
In the next windows (Figure 4 Figure 4.1) you will need to choose your address space. Basically you will be telling Exchange that you are allowed to send mail to all domains without any restrictions ,which is represented by an asterix. To do so, click on the PLUS sign Icon and enter (*) in the FQDN and leave 1 in the COST field. The importance of the cost field comes when you have two or more send connectors and you need to prioritize them, the higher the number you give to a send connector the less priority it has. In other words, the lower the cost the more priority the connector has.
Figure 4:

Figure 4.1

The next option (Figure 5, Figure 5.1) is to choose the Client Access Server (CAS), which will manage the send connector that was just created; this becomes handy when you have multiple CAS servers if not only one will show.
Figure 5:

Figure 5.1:
Once you click finish your Exchange connector is complete and listed under the mail flow >Send connector in the EMC.
To translate the above in a PowerShell only one line is required, the example below will create a custom connector (to send mail to none Exchange servers) with a name MySendConnector that allows sending mail for all domains without restrictions.
New-SendConnector: Custom: Name MySendConnector: AddressSpaces *


