With the release of Powershell within the latest releases of Windows, this option has given a lot of more power and a new way to configure the operating system instead of referring to the GUI.
How to list the Windows Features
First we need to open the Powershell windows (in Administrative Mode). Right click on the icon on the “Start” menu. And this will open the Powershell command prompt window.
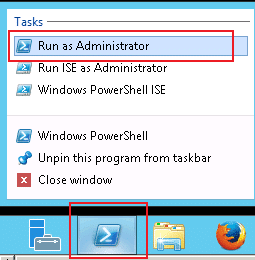
From within the Powershell window, type in the command get-windowsfeature at the prompt and press the Enter key.

After a few seconds of fetching the data, you will get the following feature list on the system:
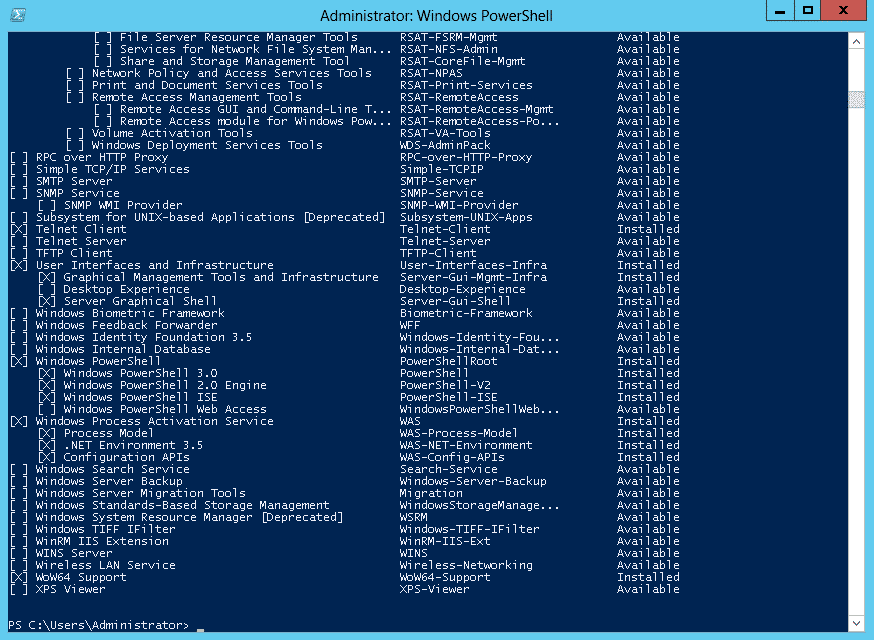
If you break up the results, we see on the left hand side the Feature in question with an “X” indicating if the option is installed or not.
In the middle, we get the actual name of the feature.
And the third column says if the feature is installed or Available.
Now if you want to install a specific feature from the list, the command will be add-windowsfeature feature name
An example would be add-windowsfeature SMTP-Server followed by the Enter key.
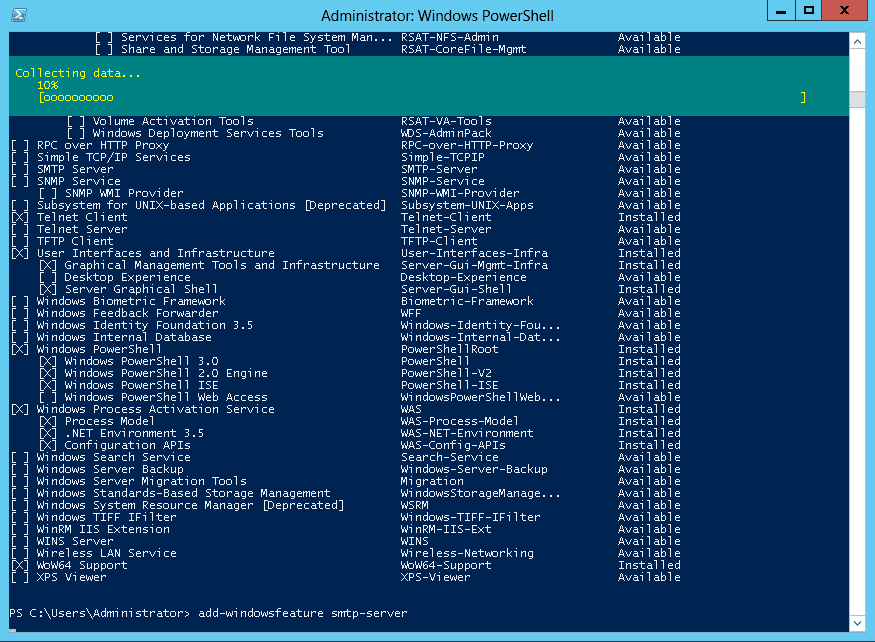
In the top portion of the window, we get a progress indicator displaying the progress of the installation.
As soon as the task has been completed, we will get a status report informing us if the feature has been properly installed and if the system needs to be restarted or not.

If the system needs to be restarted, we can do this using Powershell as well. Even though there are many switches that can be added to reboot a system, the simple command that can be executed will be RESTART-Computer and the Enter key.
